Overleaf is an online TeX editor with a lot of functionality. Most importantly for me, multiple persons can work on the same file at the same time, so it is ideal for collaboration. However not all people like to write TeX within the browser; many have their own preferred editor (TeXShop for example). Here I'd like to explain how to use your TeX editor to work with Overleaf. Edits made with the method here will be availabe via the ordinary Overleaf interface, so any of your collaborator who prefers to use Overleaf directly can continue to do so. An added bonus is that you have a clear view of all the changes made by every collaborator. For this you need to use something called git.
(The owner of the Overleaf project needs to be a paid member to use this feature. I think Overleaf is worth supporting, so please become a paid member, or ask your senior collaborator to do so.)

"git" is a protocol which allows many people to work on the same project consisting of multiple text-based files. This protocol "git" was developed by Linus Torvalds, the original developer of Linux, so that the many developers of Linux all over the world can work together. TeX is also text-based and git can handle it. There are many advantages:
Overleaf adopts git, so everything I said applies to overleaf. The basic steps to use git are:
"git" is originally a command-line app, but of course there are many graphical user interface for that. Here I will use GitHub Desktop. So please download and install it. On the first launch, it will ask you if you want to create a GitHub account. If you just use it with Overleaf, you don't need to create one, so you can skip this step.
(The relation among git, GitHub, GitHub Desktop is somewhat confusing. git is a general protocol. GitHub is a very popular service which provides online git repositories. GitHub Desktop is a free GUI app created by GitHub which allows you to manipulate git repositories not necessarily hosted on GitHub. Here we're going to use GitHub Desktop simply as a GUI app to manipulate our git repositories, so you don't need any account on GitHub.)
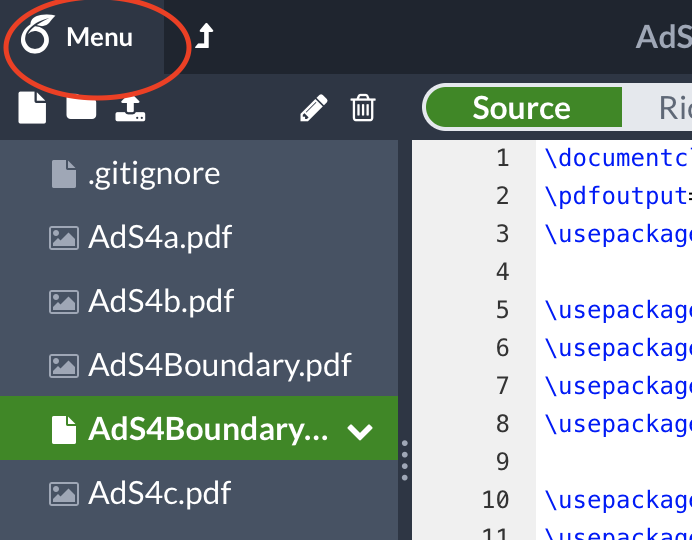
Let us now clone an Overleaf project. For this, you need to open a project in the Overleaf website. Please click the menu icon in the top-left corner:
Then click the button saying "git":
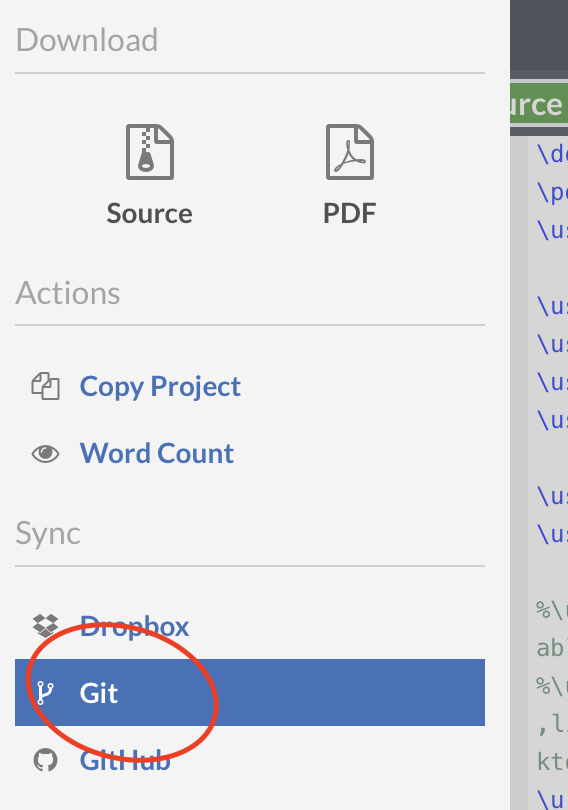
This will show an URL of the form https://git.overleaf.com/XXXXXXXXXX where the part XXXXXXXX depends on the project.
Now you open the GitHub Desktop. From its menu, select "Clone a repository". You will then see something like this:
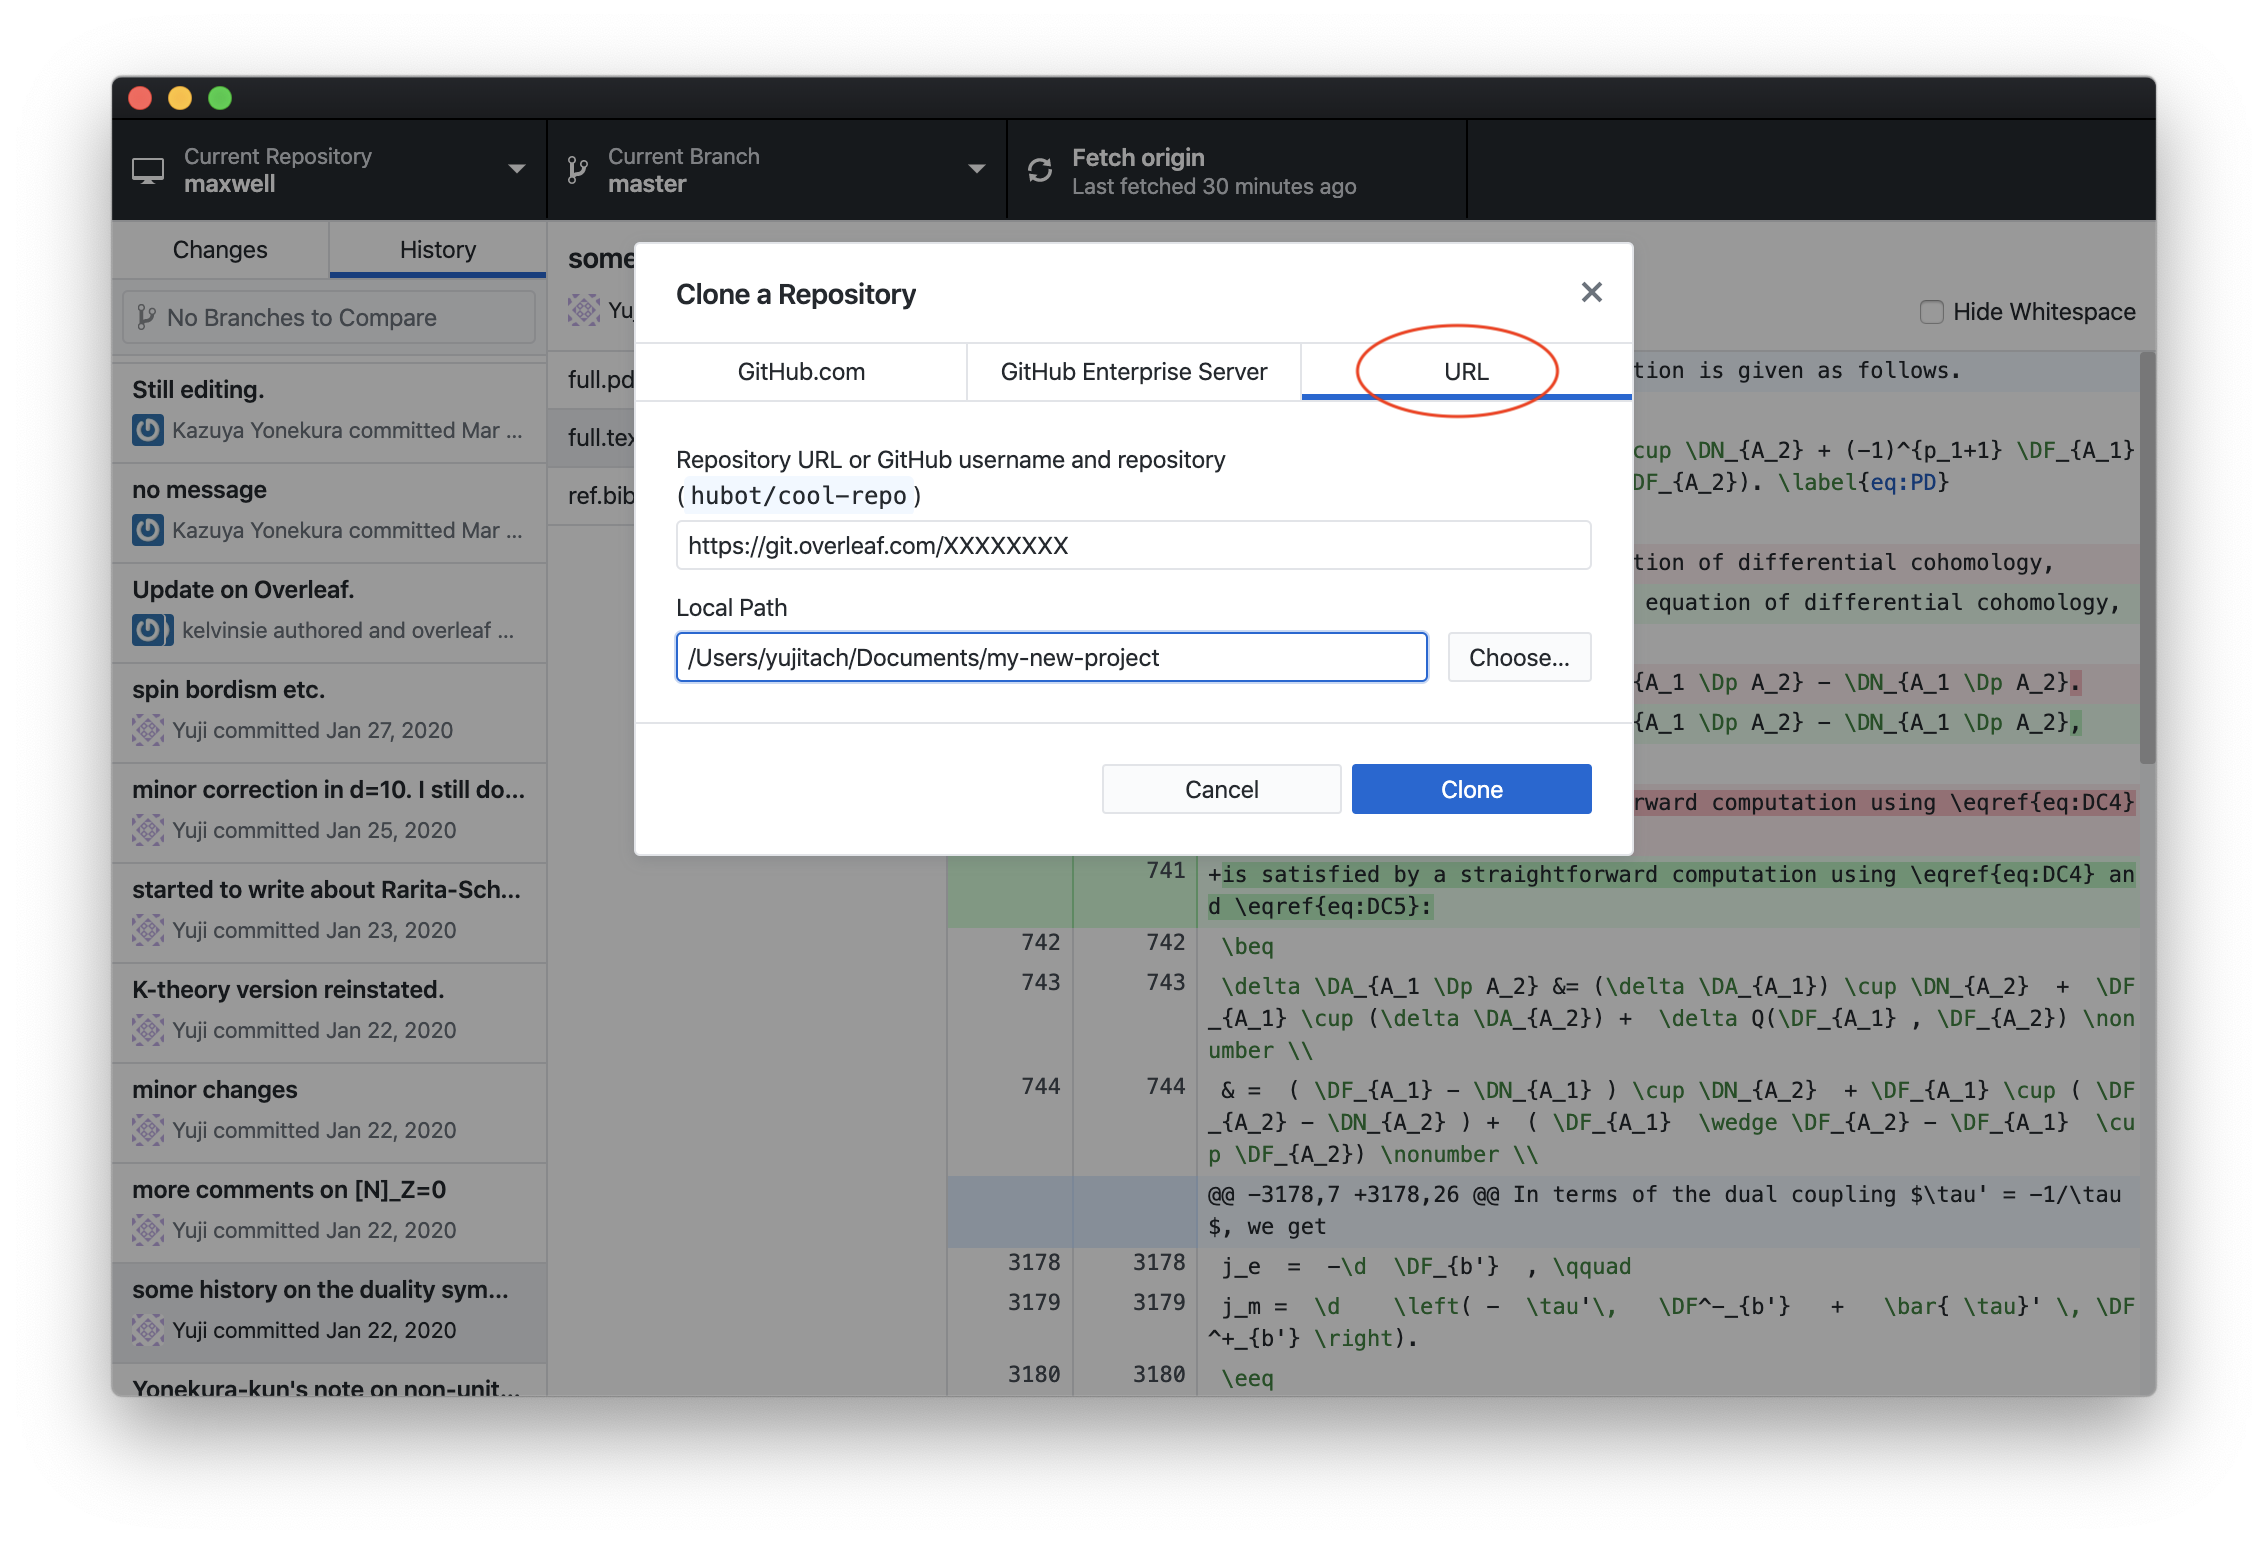
You choose the third tab saying "URL", and paste the URL given by Overleaf into it. You also need to choose the folder to put the TeX files. Now click "clone". This will ask you your Overleaf account and the password, which you need to provide only once.
Now it's basically done. Please open the folder you just selected; you'll find the TeX and associated files. Now you can work on the TeX file. Once you worked on a paragraph or so, you can commit it. To do so, go to the "Changes" tab of GitHub desktop:
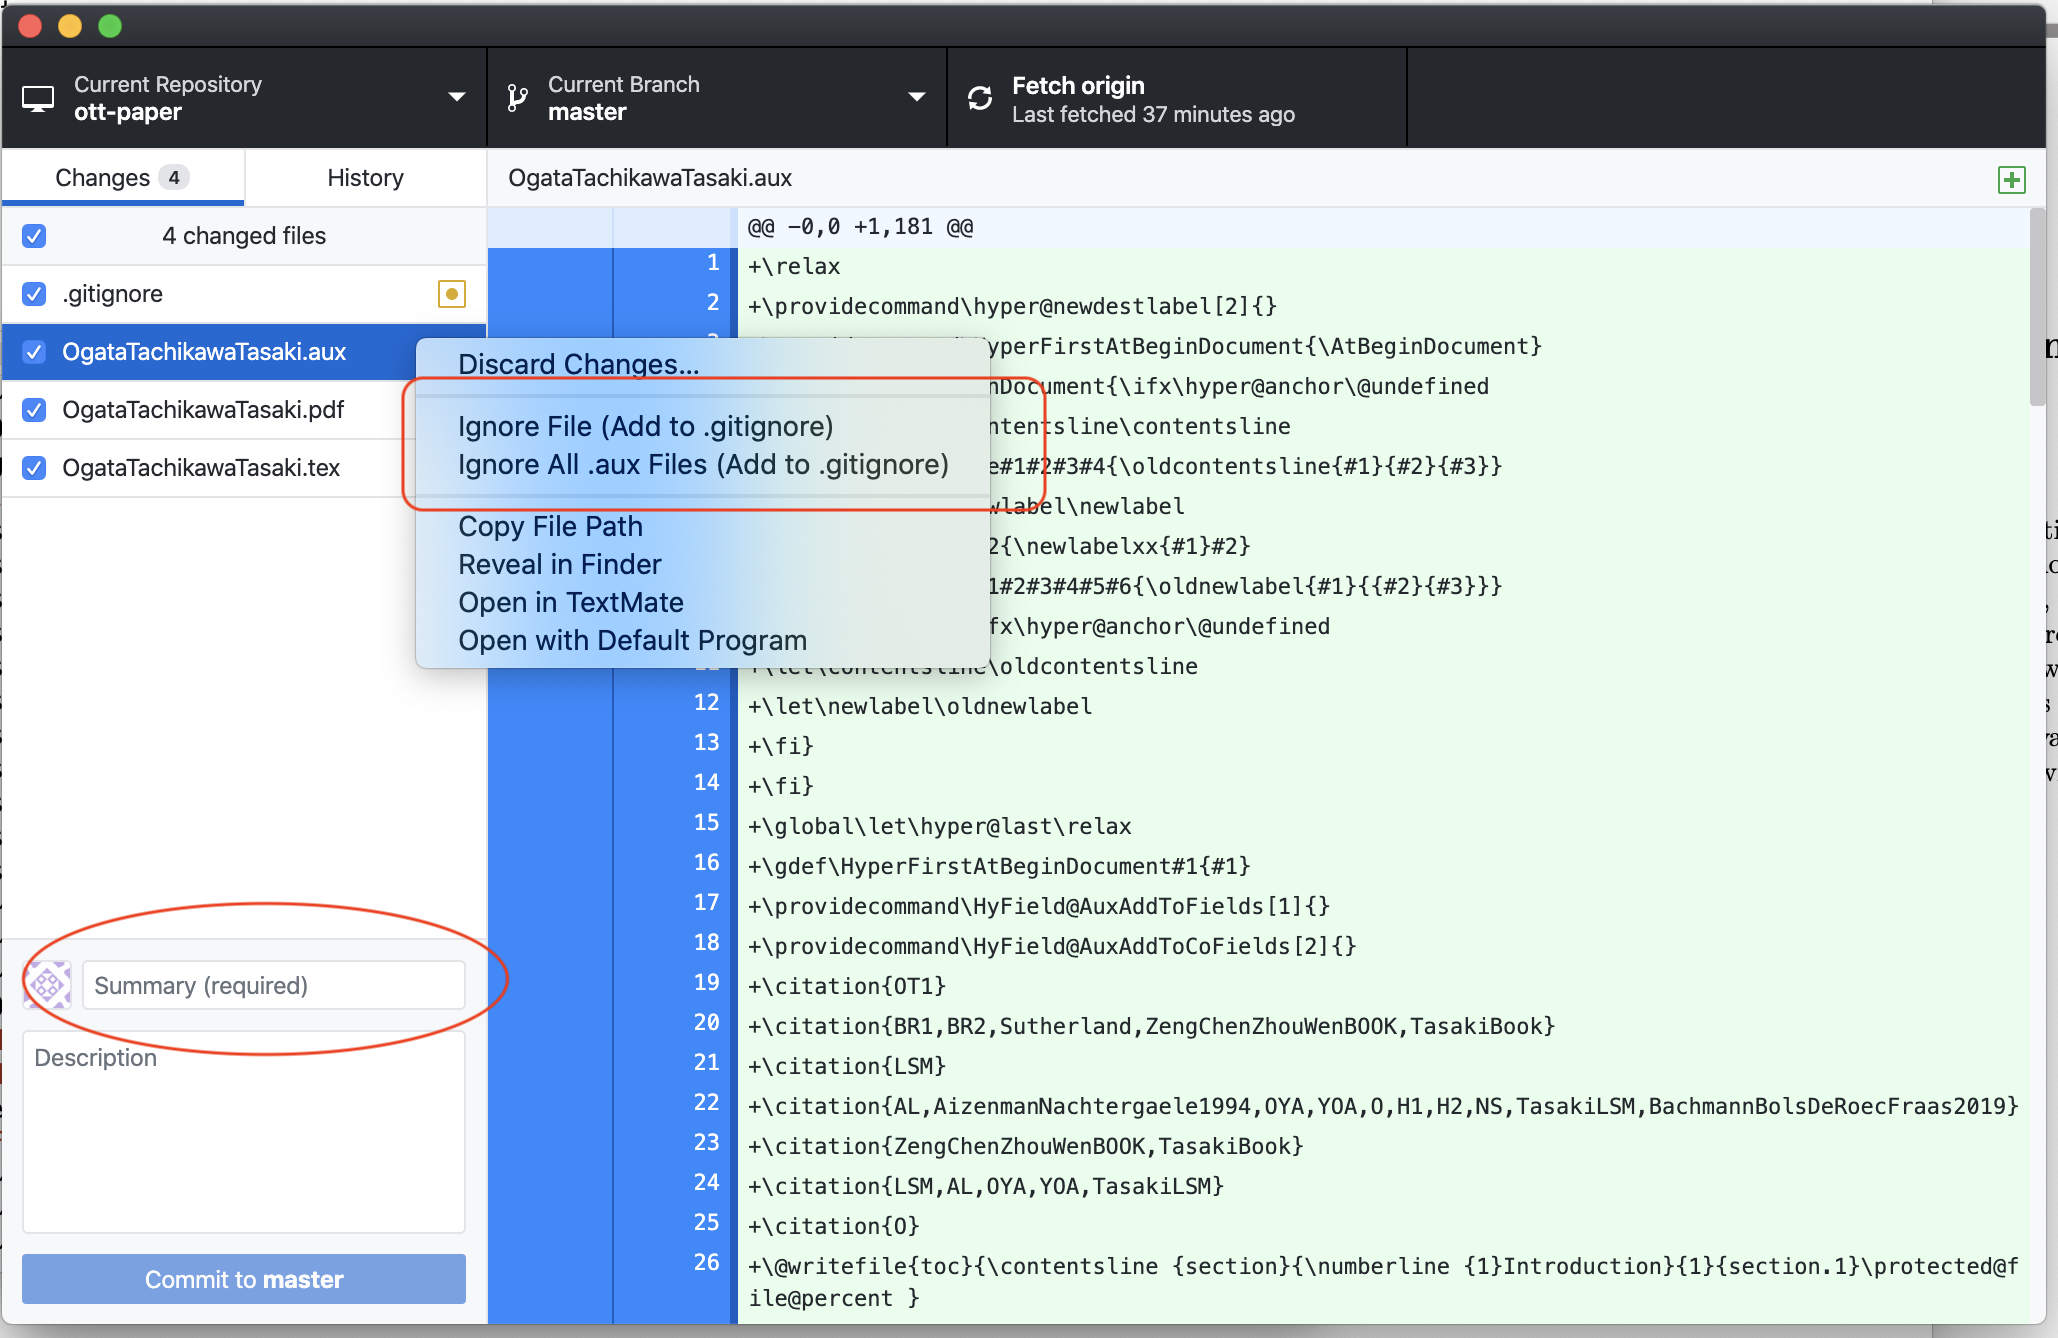
Often, there are files you don't have to commit, such as .aux files. For these, you use the context menu to tell git to ignore them. Then, you need to type in a short summary (such as "Section 3.1 half done."). You can then click the commit button to save it to the local repository. GitHub desktop will then ask you if you want to "push" it, i.e. to upload it to the online repository, which you probably would like to.
When you restart working on a file, before opening the editor, please come back to GitHub desktop, and click the "Fetch origin" button in the top part of the window. If new changes by other collaborators are available, the button contains a smaller "pull" button to get the changes.
I'll be happy to give more details if you're stuck at some point, so please don't hesitate to ask me.